How to install Hardie® Backer Board on walls
Learn how to install Hardie® Backer Board on walls in this step-by-step guide, including the tools, framing requirements, and techniques pros and installers rely on.
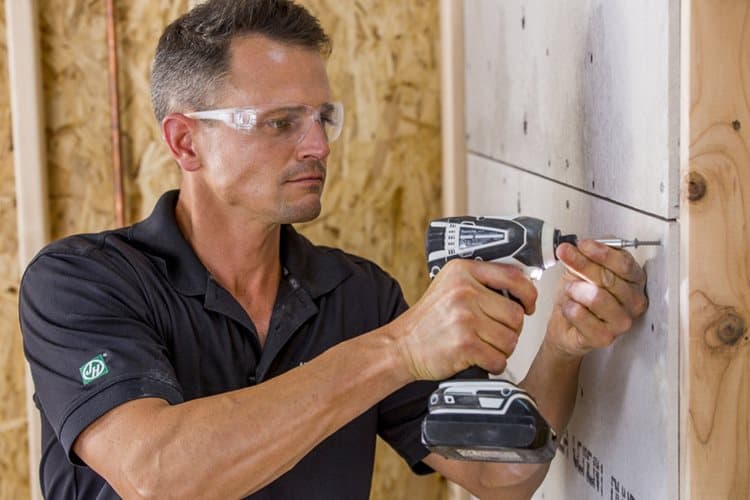
Installing tile in a kitchen or bathroom needs a stable, moisture-resistant base that holds up over time. Hardie® Backer Board gives professional contractors and installers the strength and durability that long-lasting wall tile needs. This guide walks you through the full process, from framing checks to setting tile.
When to use Hardie® Backer Board on walls
Use Hardie® Backer Board as your tile backer any time you install tile on walls, backsplashes, tub surrounds, or shower enclosures. Unlike drywall, this cement backer board resists moisture and won't swell, warp, or break down when it gets wet. That makes it a dependable choice for high-moisture areas where water damage is the biggest threat.
For walls, James Hardie recommends .42-inch Hardie® Backer Board. This thickness is built for walls and backsplashes, giving you the strength to hold tile securely while keeping a clean, manageable profile. Paired with sound framing and correct technique, it creates a solid base for ceramic, porcelain, or natural stone tile.
Important: This guide covers wall installations only. Floor applications follow different requirements and methods.
Tools and materials you'll need
Gather everything before you start. Having it all on hand keeps the job moving and your workflow clean.
- Modified dry-set cement mortar (also known as latex or acrylic modified thinset)
- Corrosion-resistant roofing nails or 1¼-inch Backer-On® screws
- 2" alkali-resistant glass fiber tape
- Notched trowel sized for your tile (for tile to board)
- Carbide-tipped scoring knife, utility knife, or shears
- Straightedge, tape measure, and chalk line
- Color-matched caulk (for floor, tub, and shower transitions)
- Recommended: Safety glasses, dust mask, and knee pads
Framing requirements for cement board installation
Your framing must meet specific structural specs before you install cement board. Skipping this check is one of the most common installation mistakes.
Minimum framing specifications
- Wood studs: 2x4 wood studs
- Metal studs: 20-gauge metal studs
- Stud spacing: A maximum of 16 inches on center
Studs must be straight, properly aligned, and spaced no more than 16 inches on center. For tub and shower enclosures, confirm the framing is adequately reinforced at the corners before you go any further.
If your framing meets the requirements, the next step is to make sure it's structurally sound and ready for board.
Assessing framing condition
Before you hang any board, inspect the framing:
- Check structural soundness. Confirm studs are secure and free of movement or rot.
- Verify alignment. Run a straightedge across the face of the studs to spot bows, twists, or proud studs that throw off a flat plane.
- Confirm spacing. Double-check that studs sit no more than 16 inches on center.
- Reinforce corners. For tub and shower enclosures, add blocking or backing at the corners so board edges land on solid support.
Once you've done that, you're ready to cut your Hardie® Backer cement board to size.
Cutting Hardie® Backer Board
Hardie® Backer Board cuts cleanly with the right technique:
- Score the board along your cut line with a carbide-tipped scoring knife and straightedge.
- Snap the board by lifting one side along the scored line.
- Smooth rough edges as needed.
For curves, cutouts, or complex shapes around fixtures and valves, use shears or a jigsaw with a carbide blade. Check out our video on how to cut Hardie® Backer cement board for detailed instructions.
How to lay out Hardie® Backer Board
A solid layout cuts waste, reduces cuts, and keeps your install within spec.
Layout rules
- Install your boards either vertically or horizontally
- Make sure board edges that run parallel to framing land on a structural stud
- Stagger joints in a brick-laying pattern so seams don't line up
- Avoid four board corners meeting at a single point, which creates a weak spot
- Leave a ¼-inch gap above the floor, tub, or shower board
These rules keep stress from concentrating at the joints and leave room for natural material movement. The spacing also gives mortar and tape room to lock the seams together.
Now you're ready to attach your board to the framing.
Step-by-step Hardie® Backer Board wall installation process
With your framing prepped and boards cut, you're ready to install. Follow these steps for a professional result. If your local building code requires it, add a waterproof membrane before you begin.
- Set the boards: Start installing your boards ¼ inch above the floor, tub, or shower board, and caulk accordingly.
- Fasten the boards: Fasten your Hardie® Backer cement board with specified nails or screws a maximum of 8 inches on center at all supports. The board's high compressive and flexural strength is designed to support tile weight under load.
- Keep fasteners ⅜ inch from board edges and 2 inches in from sheet corners.
- Set your fastener heads flush with the surface. Be careful not to overdrive them.
- Tape and fill the joints: Fill all joints with mortar. Embed 2-inch wide, high-strength, alkali-resistant glass fiber tape in the mortar and level.
How to set tile over Hardie® Backer Board
With your cement board installed and joints taped, you're ready for tile. Hardie® Backer Board works with ceramic, porcelain, and natural stone, giving you flexibility for nearly any project.
- Clean the surface: Wipe the surface of your Hardie® Backer cement board clean with a damp sponge.
- Apply modified thinset: Spread the modified thinset with a notched trowel appropriate for the size of tile you're installing. For best results, comb the ridges in one direction only.
- Set tiles firmly: Twist or press and beat in tiles.
- Allow proper cure time: Allow a minimum of 24 hours curing set time before grouting.
Installing Hardie® Backer cement board on walls is as simple as that, and it's a preferred choice for contractors because of its strength and ease of cutting.
Take your installation skills further
Mastering Hardie® Backer Board installation is one more way to deliver quality work that protects your reputation and keeps customers happy. When your tile walls stay crack-free and your callbacks stay low, everyone wins.
For complete Backer Board installation instructions and technical specs, visit the James Hardie Installation Instructions & Technical Docs page. You can also watch the official How to Install Hardie® Backer Cement Board on Walls video for a visual walkthrough.
Frequently Asked Questions
What framing do I need behind cement board on walls?
You need 2x4 wood studs or 20-gauge metal studs. They must be straight, properly aligned, and spaced a maximum of 16 inches on center. For tub and shower enclosures, reinforce the framing at the corners first.
What is the correct cement board screw spacing on walls?
Fasten nails or screws a maximum of 8 inches on center at all supports. Keep fasteners ⅜ inch from board edges and 2 inches from sheet corners, and set the heads flush without overdriving.
How long should I wait before grouting tile over Hardie® Backer Board?
Wait at least 24 hours after setting tile before you grout. This gives the thinset time to reach adequate strength. Allow more time in cold or high-humidity conditions.
What type of tape should I use on cement board joints?
Use 2-inch wide, high-strength, alkali-resistant glass fiber tape. Standard drywall tape isn't suitable for cement board. Embed the tape in fresh mortar and smooth it level with the board surface.
