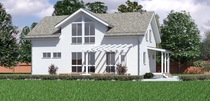
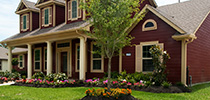
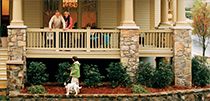
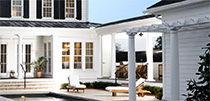
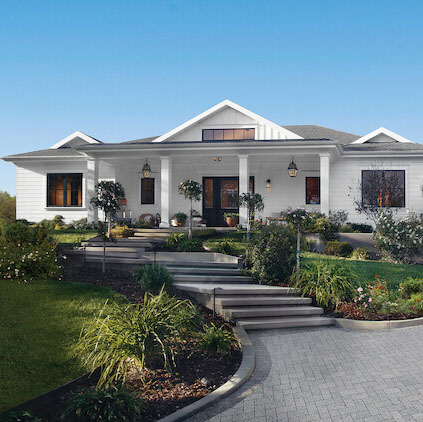
Choosing a home siding can be a daunting process. It's a whole new arena to become familiar with and it's not uncommon to have questions.
Here we've compiled homeowners' most frequently asked questions.
Where can I buy HardiePlank® lap siding, HardiePanel® vertical siding, HardieTrim® boards or HardieShingle® siding?
Since you will be working with a contractor or builder to install James Hardie brand products, the individual or company you hire for the job will purchase the necessary materials for you. You can also call customer service at 1-888-JHARDIE for your closest sales representative.
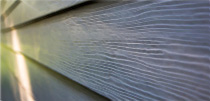
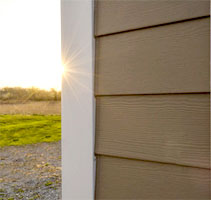
What is Hardie® siding made of?
Hardie® siding is made of fiber cement which is made up of a few simple ingredients: Portland cement, sand, water, and cellulose fibers. James Hardie’s formulation includes propriety additives that enhance the performance of the product.
How much does HardiePlank lap siding cost?
Your contractor will give you an estimate that includes labor and materials, based on your specific project. This will give you the best idea of how much siding will cost for you. You can also call customer service at 1-888-JHARDIE for your closest sales representative.
How do your prices compare to the prices of brick and vinyl?
While prices vary from market to market, this is how HardiePlank siding compares in installed price with its competitors:
· More expensive than vinyl
· Less expensive than brick
· Equal or less than hardboard or composite siding
· Less expensive than synthetic stucco
What types of trim can be used with HardiePlank lap siding?
The following are suitable trim products for use with HardiePlank lap siding:
· HardieTrim
· Fiber Cement
· Real Wood
· Engineered Wood
· Vinyl
· Coated or Corrosion-Resistant Aluminum
Can I use HardiePanel lap siding as skirting material on a mobile home?
Yes. However it needs to be installed in accordance with our written installation instructions for HardiePanel siding in regard to framing, joints, paint and clearences above ground. James Hardie provides a 1 year limited product warranty for HardiePanel used as skirting on a mobile home.
What is HardieWrap® weather barrier used for?
HardieWrap weather barrier may be used as both a water resistive barrier and as an air barrier in accordance with nationally recognized residential and commercial building codes as specified in ESR-2658, HardieWrap weather barrier is installed over the sheathing, beneath the exterior siding (cladding) to reduce water infiltration and air infiltration, while allowing potentially damaging water to escape from the building interior.
How is HardieWrap weather barrier better than other housewraps?
In independent tests, HardieWrap weather barrier outperformed its nearest competition in each of these categories: water holdout, air penetration resistance and tear resistance.
How much does HardieWrap weather barrier cost?
HardieWarp weather barrier is competitively priced. For specific information, contact a James Hardie Representative at 1-888-888-3408.
Where can I find installation instructions and best practice guides for James Hardie Building Products?
Visit JamesHardiePros.com to find installation instructions, videos and best practice guides for James Hardie brand products.
HardieBacker FAQs
What thickness is used in floor applications?
Both may be used, but we recommend HardieBacker 1/4" cement board for floor applications, unless 1/2" thickness is needed for transition.
Can HardieBacker 1/4'' board be used in a shower wall application? Is a vapor barrier required?
Yes, HardieBacker 1/4'' cement board may be used in a shower. However, we recommend HardieBacker 500 if you need to make a smooth transition to drywall. The board must be mechanically fastened every 8'' on center to the wood or metal studs spaced a maximum of 16'' on center. A vapor barrier is needed if required by local building codes.
Where do I purchase HardieBacker® cement board?
Available at Home improvement retailers and pro dealers nationwide or call customer service at 1-888-JHARDIE for your closest sales representative.
How do I cut HardieBacker® cement board?
HardieBacker board may be cut with a carbide-tipped scoring knife (found at Home Depot® and Lowe's® Home Improvement stores), utility knife, or cutting shears (manual, electric or pneumatic). If you use a grinder be sure to cut outside and use a dust reducing circular saw with a Diablo® HardieBlade™ circular saw for more protection use a HEPA vacuum extraction.
Which side goes up, smooth or rough?
Either is acceptable, but we recommend that the smooth side with the nailing pattern of every 8" on center go up.
What subfloor should HardieBacker® cement board be installed over?
The minimum subfloor specified is 5/8" exterior grade plywood or 23/32'' exterior grade OSB subflooring. HardieBacker board must be installed in accordance with local building codes and the floor must be engineered not to exceed the L/360 deflection criteria, including live and dead design loads, for the specific joist spacing used. HardieBacker board is not designed for use over concrete.
Why do I have to use thinset between HardieBacker® cement board and the subfloor?
Unmodified thinset (ANSI 118.1) or acrylic modified thinset (ANSI 118.4) is specified between the HardieBacker board and the subfloor to eliminate any deviations between our product and the subfloor. This decreases the probability of popping or cracking tiles due to deflection and air pockets.
What do you mean by ''modified thinset''?
The modified thinset used with our product is a fortified cement-based mortar and should specifically conform to ANSI (American National Standards Institute) A 118.4. The thinset can be fortified in a pre-mixed powder form or with a liquid additive.
Can I use liquid nails or glue with HardieBacker® cement board?
No. Where HardieBacker board is being installed over a code-complying subfloor for the attachment of tile, the board is installed over a 3/32''-1/4'' thick bed of bonding mortar and then nailed down. ''Liquid Nails'' is not a bonding mortar. It is a structural adhesive generally used to bond the subfloor to the floor joists just prior to nailing. It creates a very solid joint between the surface of the floor joist and the subfloor and aids in reducing floor squeak. The properties of Liquid Nails are such that it is applied via a tube in the form of a bead-like caulking. It is not trowelable like a mortar and therefore results in high ridges with unsupported areas that can deflect under load, resulting in cracked tile.
Where HardieBacker board is being installed directly to wood or metal framing, the use of a structural adhesive in addition to mechanical fastening can be used. However, the board must be forced into the structural adhesive almost immediately upon application to insure that no ridge or crown is formed. The creation of a crown or ridge will result in an additional thickness of mortar being applied to fill in the valley created by the crown. This will require a longer curing time and result in a weaker bond between the tile and the mortar and the underlayment. The use of a structural adhesive does not result in fewer fasteners being required.
What is the correct fastener pattern for installing HardieBacker® cement board?
Fasten HardieBacker sheets with proper nails or screws (as listed in ''Materials Required'' in the backer installation instructions) every 8'' around the perimeter and all supporting studs. Keep fasteners between 3/8'' and 3/4'' from sheet edges and 2'' in from sheet corners.
What type of fastener do you recommend for floor and wall applications of HardieBacker® cement board?
In compliance with the tile industry, James Hardie recommends 1-1/4'' long galvanized or stainless steel roofing nails (0.121'' shank x 3/8'' HD) or 1-1/4'' long corrosion resistant ribbed waferhead screws (No. 8-18 x 3/8'' HD).
Why can't I get screws to sit flush with the HardieBacker® cement board?
The screws that you are using do not have the power to rout out the material in order for the screw head to sit flush. Be sure to use the specified screws (1-1/4'' No.8-18 by 3/8'' HD Hi-Lo S or S-12 for metal studs, ribbed phil wafer head, self drilling, corrosion-resistant screws). If you continue to have difficulties, we recommend switching to 1-1/4'' galvanized roofing nails.
Where can I get the 2'' wide high-strength alkali-resistant glass fiber tape?
Home Depot stores and Lowe's Home Improvement Warehouses.
Can I put HardieBacker(r) cement board over linoleum or vinyl composite tile?
Yes, Hardiebacker can go over linoleum or vinyl composite tile. Even though you may go over vinyl composite tile, James Hardie does not recommend you install HardieBacker board over cushioned vinyl. Follow HardieBacker floor installation instructions for complete details.
Can I use HardieBacker(r) cement board as a fireplace facing?
Yes, HardieBacker board can be used as a fireplace facing. HardieBacker 1/4'' board can be used as a component in a 1-hour fire resistive construction when installed in compliance with National Evaluation Report NER-405. HardieBacker boards are recognized as non-combustible, when tested according to ASTM E 136.
Can I use HardieBacker cement board in an exterior application?
HardieBacker cement board may be used in some exterior applications, download the installation guide for more details.